The idea
Every Thomas toy that comes out of the box is the same: one speed, no reverse, and two AA batteries that are flat in an afternoon. That’s fine when you’re three. Less fine when you’re trying to run a test lap from the couch at 10pm after the monster of Sodor has gone to sleep.
The plan was simple, swap the batteries for a LiPo and add WiFi control from a phone browser. No app, no pairing dance, just connect and go. But once you’re pulling the shell apart, it’s hard not to keep going. Needed an animated display small enough to fit the build and big enough to still look cool.
Started with a spare SSD1306 OLED from the parts bin. Ended up ordering a colour TFT for the price of a coffee, a GC9A01, round, exactly the right shape for Thomas’s face. Designed the shell around it. Three hours in TinkerCAD, a 7 hour 3D print, and a quick test paint. But I couldn’t get the displays to work.
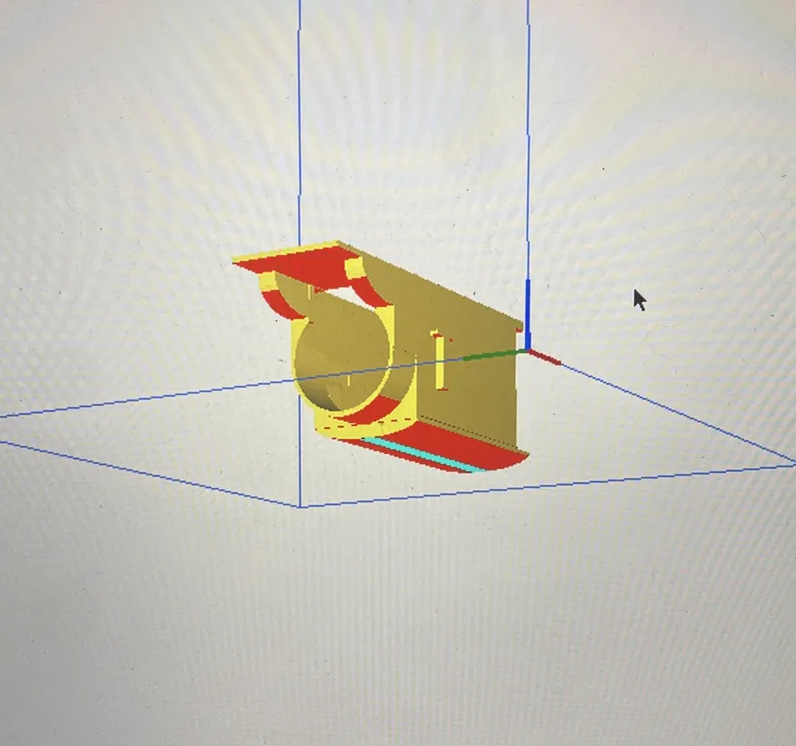 Slicer preview. Red is supports, gold is part. The round hole is where the screen goes. The curved roof is where the hours go.
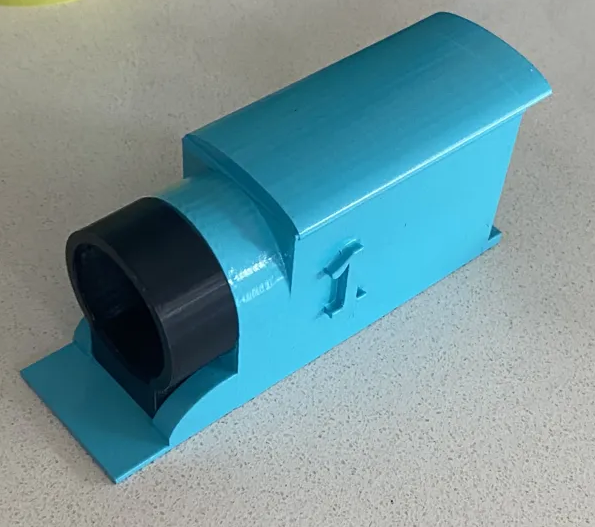 Shell fresh off the Ender. Nose hole sized to the GC9A01 footprint. Still needs the stripes and the number 1 painted up properly.
Five screens, all from the AliExpress Australian depot, all dead the same way. Garbled pixels, green lines on red, the kind of output that looks like software until you’ve ruled out software three times over. Twelve hours across TFT_eSPI, Adafruit_GC9A01A, and Arduino_GFX before it was clear the code was fine and the hardware was cooked. Went back and checked the reviews. Only Australian buyers had the same problem. A whole bad batch, quietly sitting in the local warehouse. Ordered three more from three different suppliers. Just to be sure it wasn’t me.
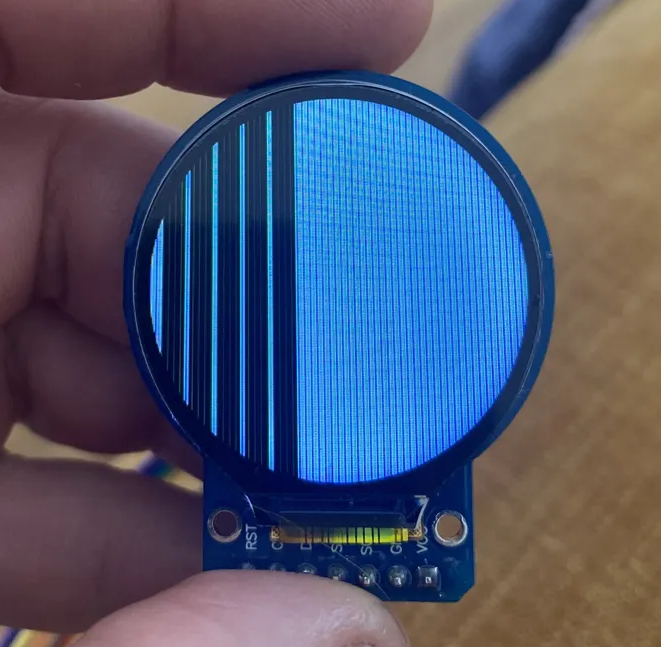 One of the five. Wired correctly, powered correctly, code confirmed on three libraries. Just a dead panel pretending to be alive.
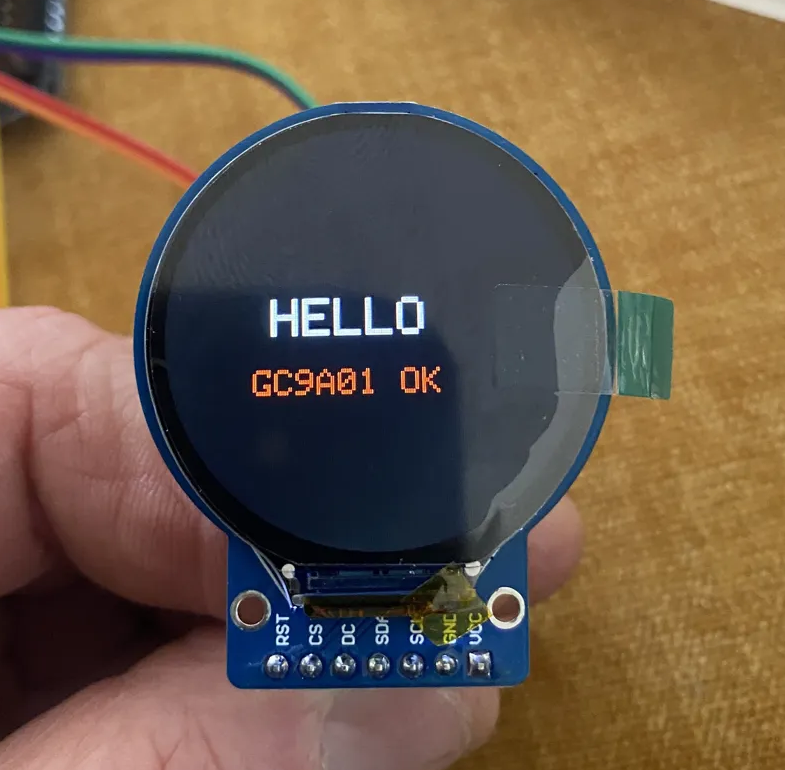 Fresh batch, first flash, five minutes from wires to HELLO. Same test sketch that showed nothing but garbage for twelve hours on the last lot.
New screens work. Thomas has a face.
Side quest accepted while waiting for the new displays to be delivered. Now there’s a diesel being built because he’s got a square face and I have a spare rectangular display, but that’s another project. Well. Kinda.
What’s inside a Thomas
Crack one open and you typically find a small DC motor driving the rear wheels, a AA battery holder, and a basic on/off switch. The shell has more space than you’d expect — enough for an ESP32-C3, a small motor driver, and a LiPo if you’re tidy about it.
Wiring overview
The ESP32-C3 runs the motors through a DRV8833 dual H-bridge driver. Two GPIO pins per motor channel give you forward, reverse, and stop. The LiPo feeds through a TP4056 charging module so you can top it up via USB without pulling it apart.
LiPo (+) → TP4056 BAT+ → ESP32-C3 5V (via boost) + DRV8833 VM
LiPo (-) → GND (common)
ESP32-C3 GPIO2 → DRV8833 AIN1
ESP32-C3 GPIO3 → DRV8833 AIN2
DRV8833 AOUT1/2 → Motor
The sketch
The ESP32-C3 hosts a tiny web server. Connect your phone to the Thomas WiFi network, open a browser, and you get a control page with forward/reverse/stop buttons.
#include <WiFi.h>
#include <WebServer.h>

const char* ssid     = "Thomas";
const char* password = "chugchug";

const int AIN1 = 2;
const int AIN2 = 3;

WebServer server(80);

const char* PAGE = R"(
<html><body style="text-align:center;font-family:sans-serif;padding:2rem">
<h2>Thomas Control</h2>
<a href="/fwd"><button style="padding:1rem 2rem;margin:0.5rem">Forward</button></a>
<a href="/rev"><button style="padding:1rem 2rem;margin:0.5rem">Reverse</button></a>
<a href="/stop"><button style="padding:1rem 2rem;margin:0.5rem">Stop</button></a>
</body></html>
)";

void setup() {
  pinMode(AIN1, OUTPUT);
  pinMode(AIN2, OUTPUT);

  WiFi.softAP(ssid, password);

  server.on("/",    [](){ server.send(200, "text/html", PAGE); });
  server.on("/fwd", [](){ digitalWrite(AIN1,HIGH); digitalWrite(AIN2,LOW);  server.sendHeader("Location","/"); server.send(303); });
  server.on("/rev", [](){ digitalWrite(AIN1,LOW);  digitalWrite(AIN2,HIGH); server.sendHeader("Location","/"); server.send(303); });
  server.on("/stop",[](){ digitalWrite(AIN1,LOW);  digitalWrite(AIN2,LOW);  server.sendHeader("Location","/"); server.send(303); });

  server.begin();
}

void loop() {
  server.handleClient();
}
What I learned
The ESP32-C3 runs hot when the WiFi radio is active and the motor driver is working at the same time — worth keeping an eye on temperatures if it’s enclosed tightly. The LiPo charging circuit also needs proper airflow or the TP4056 gets warm.
Fitting everything inside the shell is 80% of the job. The electronics are easy. The origami is hard.